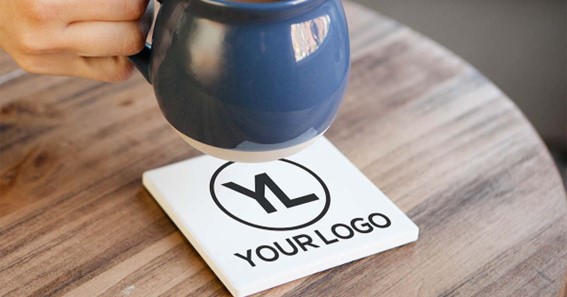
Custom coasters are a great way to add a personal touch to your home décor or to give as a unique and thoughtful gift. You can make custom paper coasters from various materials, including cork, tile, wood, or recycled paper. Best of all, they’re easy and inexpensive to make!
What You’ll Need
You’ll need some supplies before you can make your custom coasters. First, you’ll need some corkboard. You can find this at most craft stores. You’ll also need a sharp knife, a cutting tool, and some adhesive. You can use a hot glue gun, or you can use double-sided tape. You’ll also need some felt to protect your surfaces.
You can find this at most fabric stores. Finally, you’ll need whatever you want to use to decorate your coasters. This can be anything from paint to fabric to photos. Get creative!
Click here – Excel to PDF: A Comprehensive Guide to Converting Your Spreadsheets
Step One: Choose Your Design
There are a few things to consider when choosing your design for custom coasters. First, think about the overall look and feel you want to achieve. Do you want something fun and funky or sleek and modern? Consider the colours and patterns you want to use as well.
Next, think about the purpose of the coasters. Are they simply for decoration, or do you need them to protect your furniture? If you need them to be functional, choose a material that will absorb moisture.
Finally, think about how many coasters you need. You can get away with a more straightforward design if you only need a few. But if you need a set of coasters for a large party or event, you’ll need to make sure your design is scalable.
Step Two: Cut Out Your Coasters
Now that you have your design, it’s time to cut out your coasters! You will need a sharp knife and a cutting mat for this step.
First, cut a piece of cardstock or construction paper to the same size as your coasters. Then, use your knife to cut out each coaster carefully. If you mess up, don’t worry – you can always start over with a new piece of paper.
Once your coasters are cut out, you can move on to the next step.
Click here – Why Wellness Communities Are The Next Big Thing In Real Estate?
Step Three: Decorate Your Coasters
Custom coasters are a great way to add a personal touch to your home décor. Coasters are an easy and inexpensive way to protect your furniture from water damage and make great gifts. Here are five easy steps to make your custom coasters.
- Start by selecting the materials you will use. You can use cork, tile, wood, or recycled materials like old bottle caps or records.
- Cut the materials to size. You can use a sharp knife to cut it into small squares using cork. If you are using tile, you will need a tile cutter or wet saw.
- Decorate the coasters. This is the fun part! You can paint them and add decals, photos, or other images.
- Seal the coasters. This step is essential to protect your coasters from water damage. You can use a clear sealer.
- Let the coasters dry completely before using them. This step is essential to prevent the coasters from sticking to your furniture.
Step Four: Seal Your Coasters
Now that you have your coasters cut out and the design transferred, it’s time to seal them. This will protect the coasters from water damage and make them last longer. To seal the coasters, you will need to use a clear sealer. You can find this at most craft stores. Apply a thin sealer layer to each coaster’s top and bottom. Allow the sealer to dry completely before using the coasters.
Conclusion
Thanks for reading! We hope this guide has helped you learn how to make your custom coasters.